IT Band Injury Guide
How to get rid of IT Band Pain
Being consistent with a daily movement routine is important, whether it is in the gym, a sports club or simply being out in nature. When you have an exercise routine dialed in, you feel in control of everything you do. Staying mentally clear, strong, confident, you feel like there is nothing that can stop you. On the flip side, if you become sidelined with an injury, it can be physically and emotionally devastating.
For more personal coaching, check out our mobile app MoveWell. MoveWell is a personal mobility coaching app that I built to help you get stronger, recovery faster and move well. Download it for free here.
The true test of a person is how they respond to and maintain progress and growth when dealing with an acute or chronic injury. One of the most common sites of injury and pain happens at the iliotibial band (IT) band, commonly known as IT Band Syndrome. The syndrome is especially common in runners and hikers as well as dynamic, explosive athletes, like those who jump and sprint.
The main symptoms of IT Band Syndrome are pain or tightness in the outside of the knee joint, pain along the outer thigh that worsens with impact activities. It is caused by connective tissue rubbing against the thighbone. This occurs due excessive stiffness or tightness. The tissue becomes so tight that encapsulation occurs forcing the area and IT band to not glide smoothly on the surrounding tissues.
One might think the best methods for dealing with this issue is to simply stay off of it until it feels better, but in my personal experience and professional opinion becoming stagnant solves little to nothing. The body thrives through movement, my personal mantra is “Movement is Medicine.” When we place the body through proper movement and range of motions (not necessarily exercise or a workout) it will start to heal, check in, recalibrate and do it’s best to solve the issue.
There are two underlying themes that must be addressed in order to help prevent or remedy IT band pain: Mechanics and Mobility.
The Mechanics Behind Your IT Band
Use the example of a bodyworker. When your body is tight and sore, a bodyworker can help provide relief by releasing muscular and fascial adhesions. However, more likely than not, you will continue to show the same symptoms over and over again even after being treated. If this is the case, you may be suffering from a mechanical issue in your movement patterns.
Does the bodyworker offer great aid and relief? Absolutely. But in most cases, the symptoms are being treated and not the underlying issue. If the mechanics are off, the issue will not be resolved until the faulty movement pattern has been corrected. So, what’s the answer? Grab a video camera, cell phone, go pro and start recording your exercise routine. Watch carefully and take note of how you are moving. More than likely poor movement patterns are not occurring because of conscious efforts, but rather subconscious reactions to imbalances in the body or being out of alignment. If you feel like you do not have the “coach’s eye” to determine improper movement, find a coach, trainer or movement specialist and ask for help. In my experience, if I ever have an athlete, gym goer or client who is rehabilitating and I am unable to help or it is out of my scope, I am happy to refer them to a more specialized professional who is better suited to aid in their recovery. The end goal is to fix the source of the problem, the mechanics, to ultimately prevent the symptoms from reoccurring.
Improving Your IT Band and Overall Mobility
Eventually, no matter how well any person, athlete or gym goer moves, the body needs recovery. The body needs maintenance, care, stretching and mobility. Any person who follows a workout regiment on a daily basis and never warms up, cools down or focuses on recovery is likely to develop an injury. Before too long, the body will begin working against itself. Recovery days, exercises and drills are crucial to ensuring the proper development and growth of a healthy body.
In an “overworked state” the body will develop imbalances and adhesions due to muscle repair that will eventually lead to injury. This same principle can be applied for IT Band Syndrome. Mobility, movement and flexibility are absolutely necessary in order to help prevent this occurrence from happening to you.
- Yoga: Whether you follow a routine of hard workouts or intense activity, it is paramount to have or practice a form of movement/flow to allow your body to relax and lengthen. So often in exercise we contract, flex and place great forces on our body. Rarely do we take the time to teach and train our body to relax, lengthen and heal. Yoga offers that, and in my opinion it pairs quite perfectly/beautifully with any workout regiment. Along with the physical benefits, yoga and meditation have been shown to help calm the body, restoring the body to a parasympathetic state (rest and repose) versus a sympathetic state (fight or flight.)
- Mobility: Similar to yoga, this practice allows the practitioner to pin point certain areas of the body to help aid in a effective and expedited recovery. When we experience pain, discomfort or unease in a specific part of our body, these symptoms are usually related to tight, imbalanced and overworked tissues. A simple remedy is to pinpoint areas that surround the affected area. For example, in IT Band Syndrome, one easy way to help alleviate pain is to mobilize your glutes, quads and hamstrings. If the surrounding areas can be relaxed, stretched and made more malleable the excess stress on the IT band can disburse more evenly throughout the entire area allowing for less pain and better cohesion with the tissues in the area.
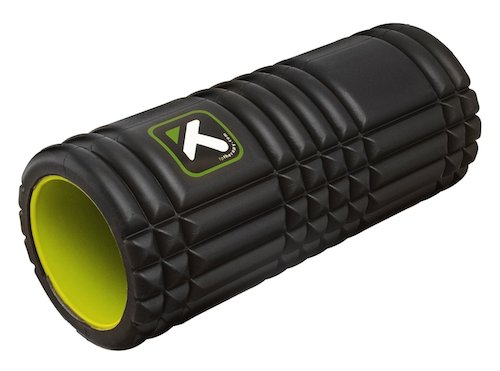
Why You Shouldn’t Foam Roll the IT Band
I cannot count how many times I have heard, or personally have had the urge to want to test out a muscle I have just recently injured to see its “limit.” You might think, “How bad is it? Maybe it’s just needs to warm up to be out of pain.” WRONG, don’t do it. It is common to want to test out an injury immediately, but the reality is that our body needs time to recognize, analyze and heal the injured area.
In the case of IT band pain, the common course of treatment/action is to directly roll out the IT band. However, direct force on an already inflamed tendon can potentially lead to further issues, such as creating or making microtears in the tendon worse. Yes, there may be immediate relief but this is more than likely due to releasing of deeper tissues, such as the vastis lateralis, a quad muscle that lies directly underneath the IT band. Even if you feel a little better afterwards, the pain will come back as the main issue remains— the IT band will still rub on the thigh bone to create pain.
The simple solution? Don’t “roll” out the IT band, instead, attack the surrounding areas, such as the quads and glutes. Here are a few easy mobility & flexibility drills that can quickly help, aid and alleviate IT band pain within minutes.
Glute Ball Rollout
- Start in a seated position, knees bent roughly 90* and both hands planted slightly behind you.
- Place a lacrosse ball or other similar item under one glute. (Not in-between the cheeks!!!)
- Start by slowly allowing bodyweight onto the ball.
- Travel un a semi-circle motion until you find tight areas (hot spots.)
- Maintain pressure and time on the hot spots (1-2 minutes)
- After approximately 5 minutes, take the active leg (the glute with the ball) and abduct (take away/drop the knee out in a half butterfly position)
- Draw the leg/knee back into its original position (adduct)
- Repeat for roughly 1-2 minutes.
- Upon completion, stand up, walk around, hydrate and repeat on the opposite side.
Hip Flexor Stretch
Grab a towel, pad, mat or soft cushion (place against a wall on the floor)
- Start close to a wall, facing away from the wall.
- Start on hands and knees
- Take the left leg and place the knee and top of foot against the wall (toes pointing up the wall)
- Keeping contact of the knee and top of foot, drop the knee until it locates where the ground meets the wall.
- If the stretch feels good stay here but if not please continue the following steps.
- Step the right leg (inactive leg, the leg not against the wall) outside the right hand.
- At this point the stretch may be perfect, if so maintain. If too aggressive refer back to step 4-5.
- Lastly if you have the ability to go further in this stretch place both hands on the left though and raise the upper torso to a vertical position.
- Maintain for 2-3 minutes.
- Dismount, walk and hydrate before repeating on the opposite side.
- Enjoy your lengthened hip flexors and live well!