Lizard
If you have ever taken a yoga class before, or done a yoga routine from the comfort of your own home, chances are you are familiar with the lizard pose. The lizard pose is a deep stretch for the hips and legs. It is a very similar movement pattern to the runner’s lunge, but takes it even a step further as the forearms are on the ground. This allows your hips to sink even deeper into the stretch.
Text version of this video
A written walkthrough of the clip. The video has no narration transcript or captions.
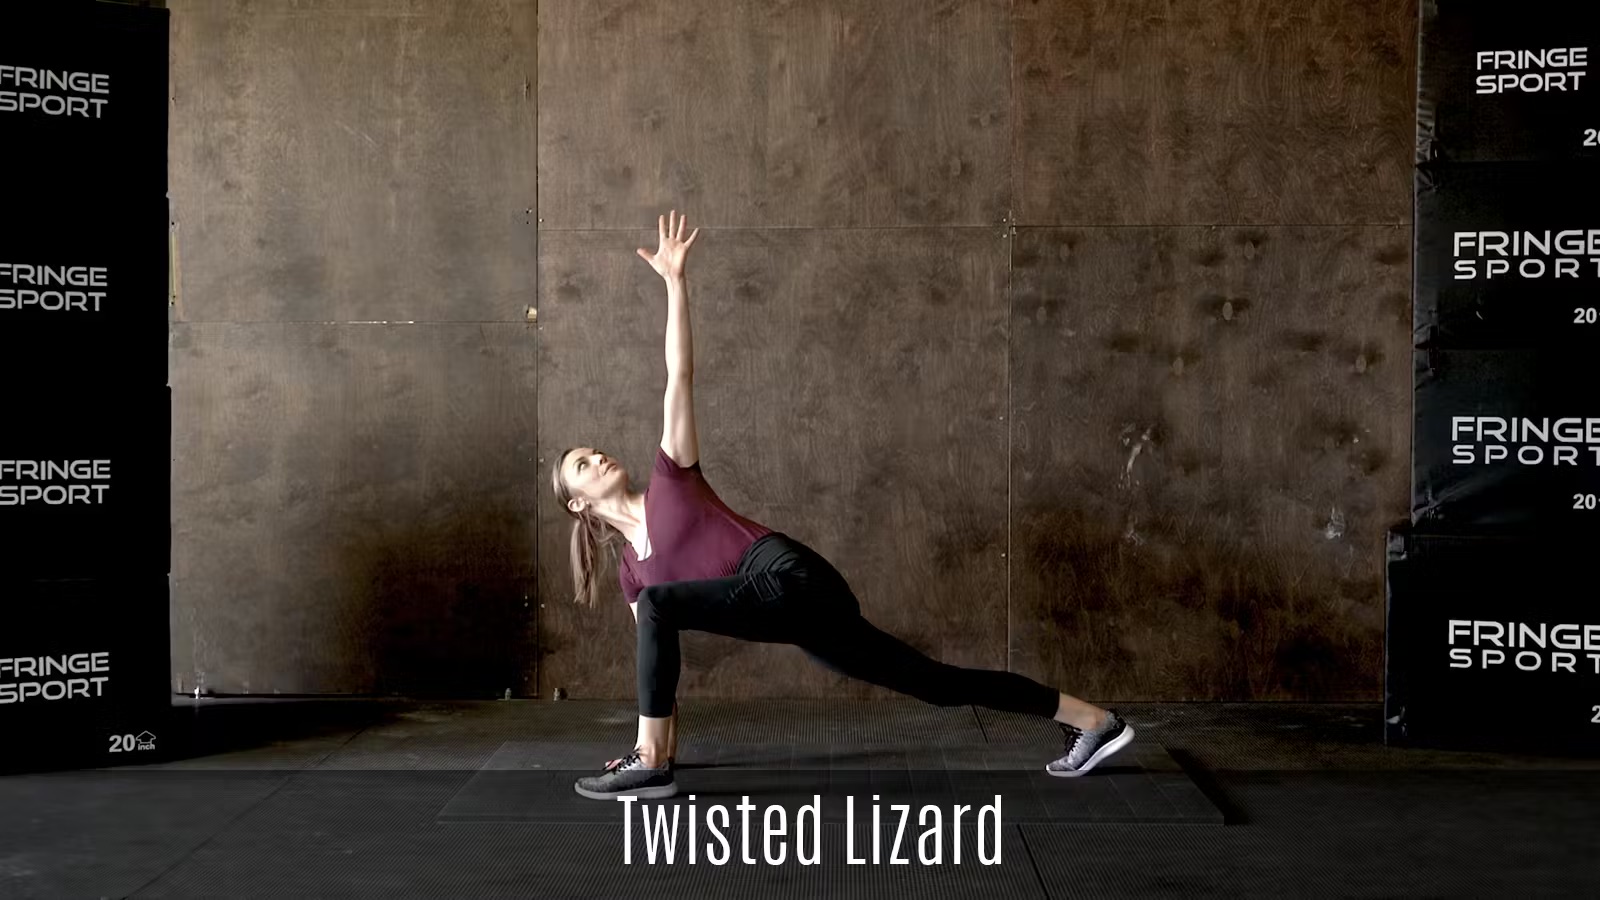
The clip shows the lizard lunge with an added arm reach toward the ceiling (the twisted lizard). For the basic lizard, stop before the reach and keep both hands down.
Step 1: Start in tabletop. Step 2: Step one foot outside the same-side hand, knee over ankle. Step 3: Extend the back leg, knee down or lifted. Step 4: Sink the hips toward the floor. Step 5: Stay on your hands, or lower to forearms if comfortable. Step 6: Switch sides.
Suggested dosage: 30 to 60 seconds per side.
How to Do the Lizard
- Start in tabletop.
- Step one foot outside the same-side hand, knee over ankle.
- Extend the back leg, knee down or lifted.
- Sink the hips toward the floor.
- Stay on your hands, or lower to forearms if comfortable.
- Switch sides.
How long: 30 to 60 seconds per side. Do both sides.
Muscles Worked
Primary: Iliopsoas, Adductors
Secondary: Hamstrings, Glutes
Common Mistakes
- Letting the front knee fall inward.
- Dumping weight into the lower back.
- Forcing the forearms down too early.
Easier and Harder Variations
- Easier: Runner's Lunge
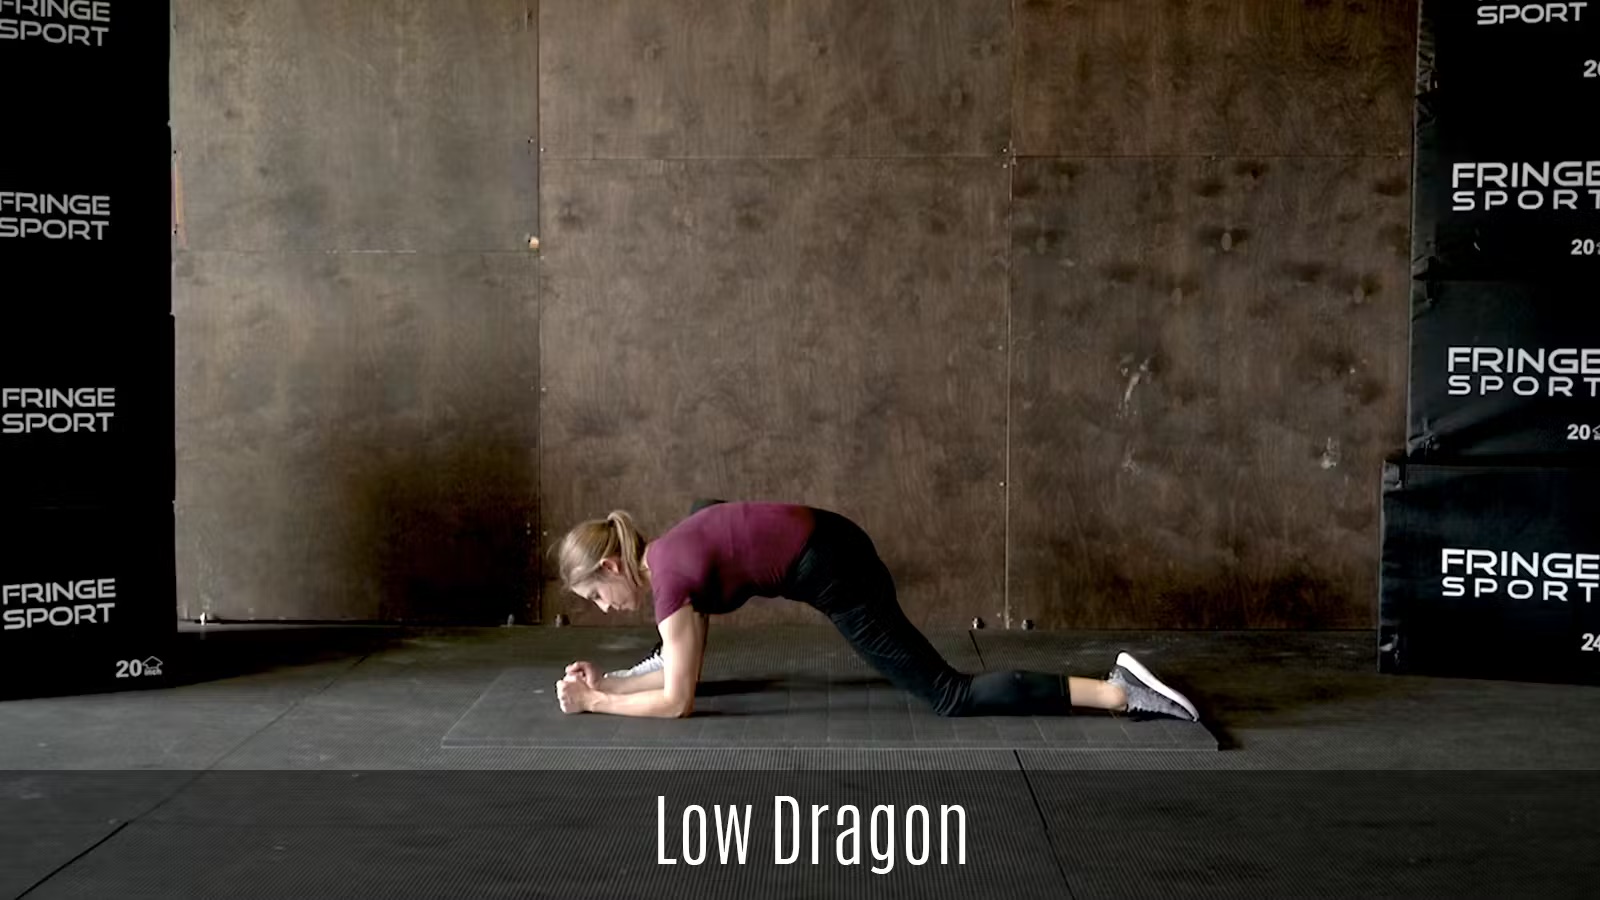
- Harder: Low Dragon
More About the Lizard
Not only is the lizard pose great for your hips, but your groins, quadricep muscles, and hamstrings will benefit as well. This stretch really hits the big, important muscles in your legs. That being said, it can be quite intense, especially if you have limited mobility or range of motion.
In this article, we’ll cover how exactly to safely perform this stretch. We will also cover the benefits of incorporating this stretch into your daily or weekly routine. Lastly, we will be sure to include modifications. If you find that this stretch is a little too deep for your needs, we’ll give you other options to complete it at your ability level and reap the benefits of this hip opening stretch.
What is the Lizard Pose?
First and foremost, the lizard pose is a big hip-opening stretch that comes from the practice of yoga. While this pose originated in yoga, you definitely don’t have to be a yoga practitioner to incorporate it into your stretching routine. In fact, athletes and Average Joe’s alike could benefit greatly from this stretch.
We recommend coming into this position from a Tabletop position. Some others may have you enter this pose through downward facing dog. Either way is fine. You should choose the option that feels best and safest to you.
In the Tabletop position, make sure your hands are placed on the floor directly under your shoulders. Your knees should also make contact with the floor directly under your hips. Keep your gaze down at the floor and your spine in a neutral position.
Once you’ve properly set yourself up in Tabletop, bring your right foot up and place it outside of your right hand. Your knee should be directly over your ankle. Then, extend your left leg straight out behind you with your left knee raised off of the ground.
Lastly, come down onto your forearms. This is the part of the stretch that makes it deeper than your standard runner’s lunge. Avoid rounding through your back too much. Think about keeping a nice, flat back. Breathe deeply – especially if this is on the intense side for you. Allow gravity to help your hips sink down and open up.
We recommend holding this pose for at least 30 seconds, but upwards of a minute or more if possible. After holding this pose for a set amount of time, gently come out of the stretch by coming onto your hands and returning to a Tabletop position. Repeat on the opposite side for the same amount of time.
Benefits of the Lizard Pose
We’ve already covered that this pose will help you open up your hips and improve your flexibility in this area. But this is also a great pose for toning the muscles in your lower body like your quads and hamstrings. Paired with a well-structured workout routine, this pose will help stabilize and strengthen your lower body muscles as well as increase your flexibility.
Tight hips can cause a host of other problems including low back pain and even sciatic nerve pain. If you struggle with issues related to this, it would be beneficial to incorporate lizard pose – or a variation – into your stretching routine. Your hips can impact so many other areas of your body, so it behooves you to take proper care of them by stretching them frequently.
Lizard Pose Modifications
For some, this stretch may be way too intense. On the scale of stretches, this could be considered a bit more advanced strictly because of the mobility and strength required to hold it for an extended period of time.
Fortunately, there are simple ways to modify lizard pose to receive the benefits of the posture without going all the way into it. The worst thing you can do is try to force yourself into this posture without having the proper range of motion to do so. This will surely lead to a strain or other injury. Work within your means consistently, and before long you will build up the flexibility to move deeper into the stretch.
An easy modification to this pose is to lower the back knee to the ground instead of keeping it elevated. If the ground feels too hard on your knee, you can pad it using a blanket or towel.
If coming onto your forearms is too much for you, instead stay on your hands like you would for the runner’s lunge. You could also elevate your forearms on a surface using a yoga block or folded-up blanket.
Starting in a tabletop position, step one foot outside the hand. The back knee stays on the floor or lifts up depending on your ability.