Seated pigeon pose is a modification of the classic pigeon pose that you have probably attempted before if you have ever found yourself in a group class setting or practicing yoga. Known as a big hip opening stretch, the traditional pigeon pose can be a little intimidating if you are new to a stretching routine. This is where the seated version comes in incredibly handy! The benefits of hip-opening stretches are undeniable, though, and there are always ways to modify the original stretch to meet you exactly where you are at in your flexibility journey.
Cue the seated pigeon pose! It is important when approaching a move such as this one that care be taken to avoid any injury or unnecessary strain in the muscles that you are actually trying to care for.
In this article, we will walk through the basics of the seated pigeon pose variation. We will cover how to perform the stretch safely, the benefits of doing this stretch on a regular basis, and then ways to modify it to meet your own current ability level. Let’s get to opening those hips!
What is the Seated Pigeon Pose?
There are variations of the pigeon pose that build one on top of the other. The seated pigeon pose is the beginner version of the stretch and is a great one to do if you are trying to work your way up to having the flexibility to perform the classic pigeon pose. All you need to do this stretch is a space on the floor, a yoga mat if you would like, and your own body weight.
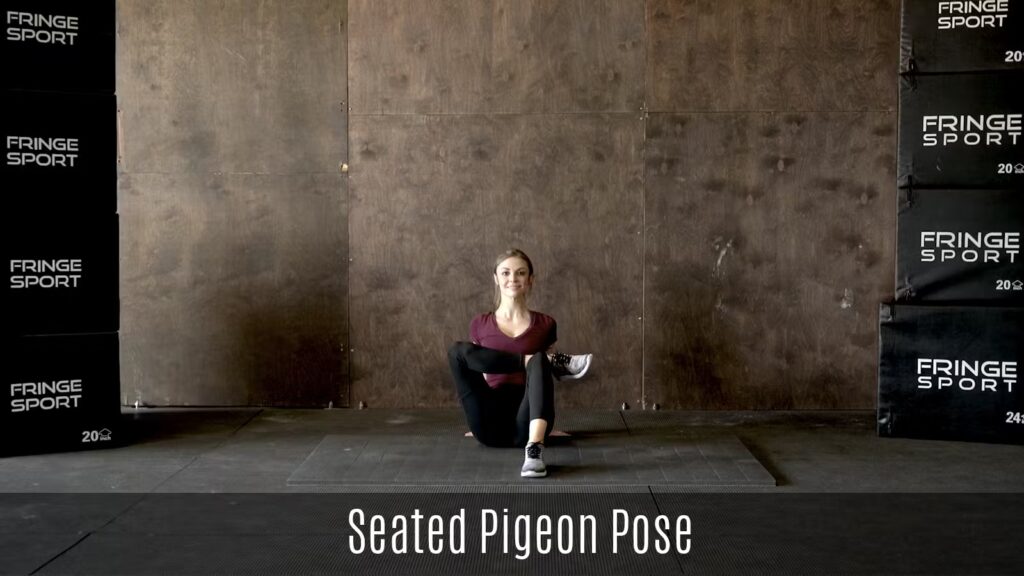
First things first, roll out your yoga mat if you are choosing to use one. Come onto your yoga mat in a seated position with your legs crossed. From here, take both hands behind you and place them on the floor for stability. Plant your feet firmly on the floor with your knees bent.
Draw your left ankle onto your right thigh avoiding the knee. Scoot your butt up a little closer to the feet and hold this position. Try your best to avoid hunching through the back. Keep the chest nice and proud as you hold this position.
You should feel a deep stretch in your hips and glute muscles. Hold this pose for your desired amount of time. We recommend starting with 30 seconds and then building up from there.
To come out of the pose, take your ankle off of your thigh and plant your foot back onto the floor. Repeat this pose on the other side following the steps stated above. Hold for the same amount of time.
Because this can be quite intense, it is very important that you remember to breathe deeply as you hold the pose. Think about expanding on the inhale (whatever that might mean to you), and then sinking gently deeper into the pose on the exhale.
Benefits of Seated Pigeon Pose
The seated pigeon pose is a great posture for the hips and the glutes. If either of these muscle groups are tight, feel free to give this stretch a go and see how it benefits you.
This pose can actually stretch out the glute muscles, increase flexibility and looseness in your hamstrings, and build up the flexibility and openness within your feet and ankles. This pose can also prepare you for more advanced variations of hip-opening movements.
Seated Pigeon Pose Modifications
Because this can be an intense hip opener, there are ways to modify it to make it better suited for your personal range of motion. The first way to do this is to pad your hips if needed. If you have trouble keeping your chest upright with your legs crossed, think about elevating your hips on something like a bolster, folded blanket, or towel.
If crossing one ankle over the opposite leg with your knees bent is not an accessible movement, try keeping your legs extended instead. With your legs long in front of you, bring your right ankle onto the top of your left thigh. Fold your torso over your legs to receive that nice stretch through your glutes.
This seated position can also be performed while sitting in a chair. Plant both feet on the ground and sit up nice and tall. Again, bring one ankle onto the opposite thigh. Fold your torso over your legs to target the hips and glute muscles. Hold here for your desired amount of time. When you have done the stretch on one side, return to the starting position and perform on the opposite leg.
If you ever feel any pain in the knees, hips, or groin, come safely out of the stretch immediately. While this stretch is commonly intense, it should never be painful.
Starting in a seated position, bend both knees 90* with both hands behind you supporting your body. Draw (left / right) ankle onto opposite knee. Scoot your butt up a little closer to the feet and hold position.


